Table of Contents
ToggleIntroduction to the Arduino Integrated Development Environment (IDE)
The Arduino Integrated Development Environment (IDE) is the cornerstone of the Arduino ecosystem. It is an open-source software specifically designed to simplify programming Arduino boards. The IDE enables users to write, compile, and upload code directly to the Arduino board for execution. Designed to accommodate both beginners and experienced programmers, the IDE combines a clear, straightforward interface with powerful development tools.
Getting Started with the Arduino IDE: Installation and Setup
Installing the Arduino IDE is a straightforward process that can be performed on various operating systems such as Windows, macOS, and Linux. Here’s a quick guide:
- Download: Visit the official Arduino website (arduino.cc) and navigate to the “Software” section. Here, you can download the latest version of the Arduino IDE for your operating system.
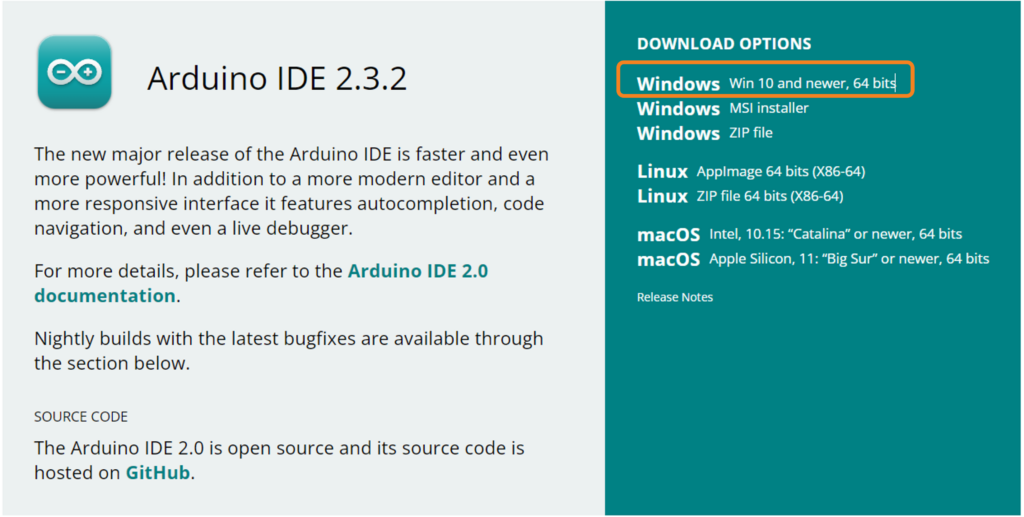
- Execute: Navigate to your Downloads folder, double-click on the downloaded file arduino-ide_x.x.x_Windows_64bit.exe to initiate the installation process.
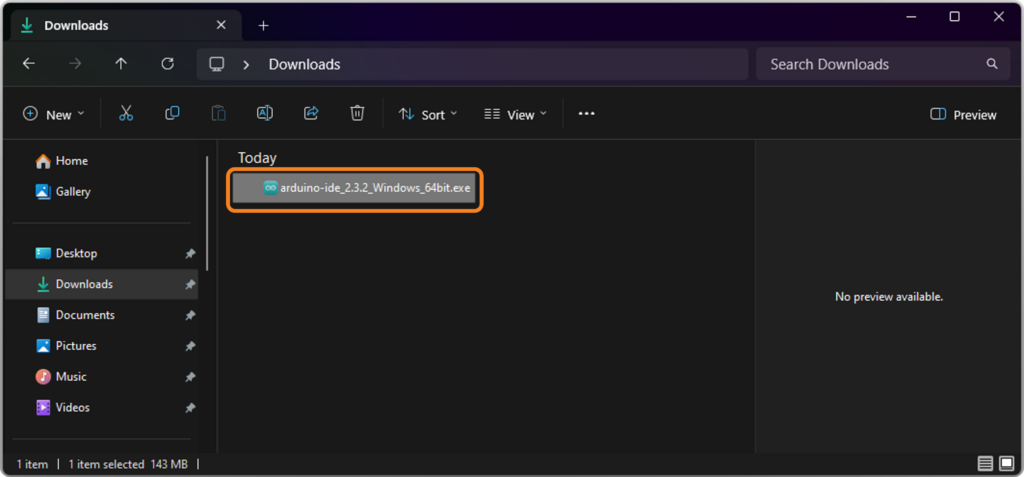
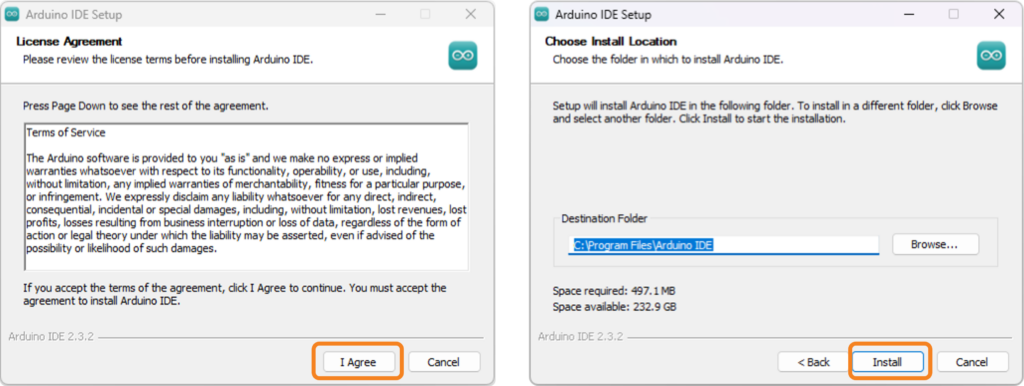
- Installation Wizard: The installer will guide you through the process. Opt for the full installation, which includes necessary drivers, if prompted.
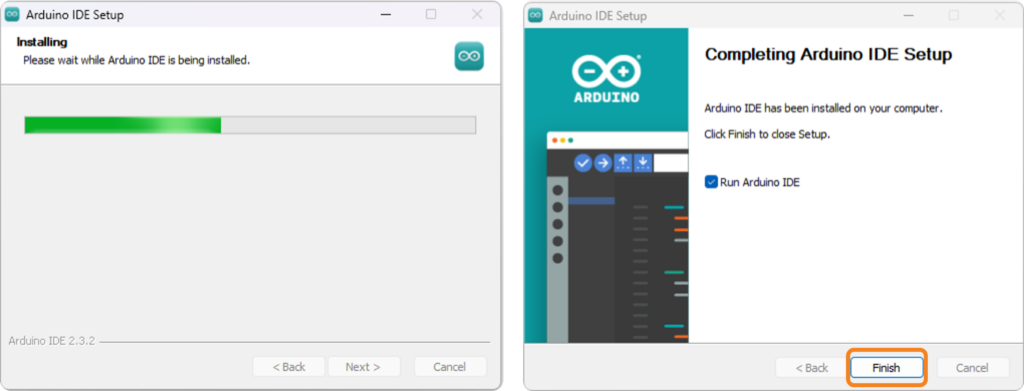
- Installation Progress: Wait for the green progress bar to fill completely, indicating that the installation is underway.
- Completion: Once the installation is finished, a confirmation message will appear. Click “Finish” to close the installer and launch the IDE.
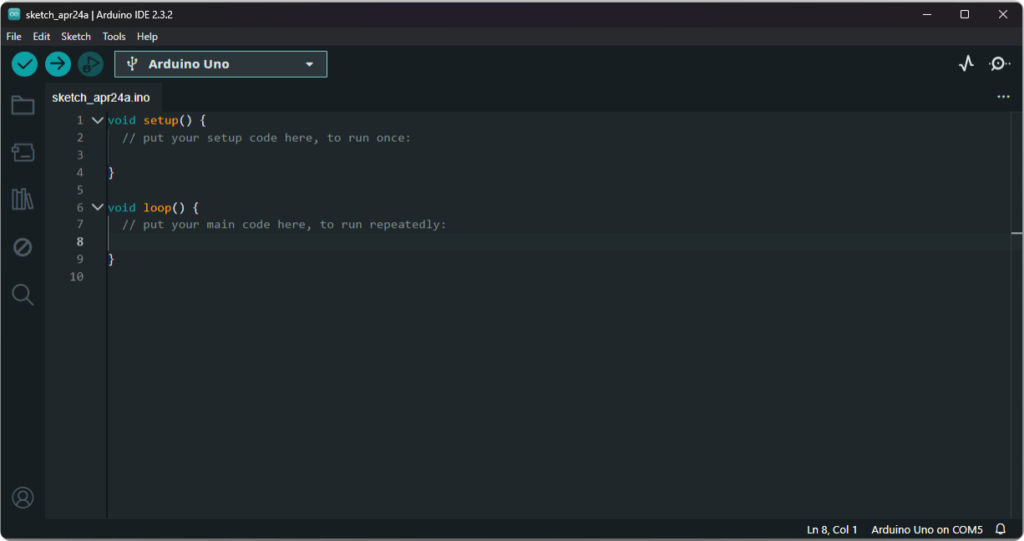
Upon opening the Arduino IDE, you’re greeted with a clean interface displaying a new sketch, typically named with the date, such as sketch_apr24a. This sketch contains two essential functions: setup() and loop(), which form the backbone of most Arduino programs.
The setup() function is where you initialize your settings. This code runs once when you power up your Arduino or reset it. It’s used to set pin modes or start libraries—essentially, to set up the conditions your program needs before it starts.
The loop() function is the heart of your sketch. It continually executes the code within its braces as long as the Arduino has power. This is where you put the code that actively controls the Arduino, reading sensors, controlling motors, and more. Any commands you write here repeat in order, from top to bottom, until the device is turned off or reset.
Overview of the IDE Interface
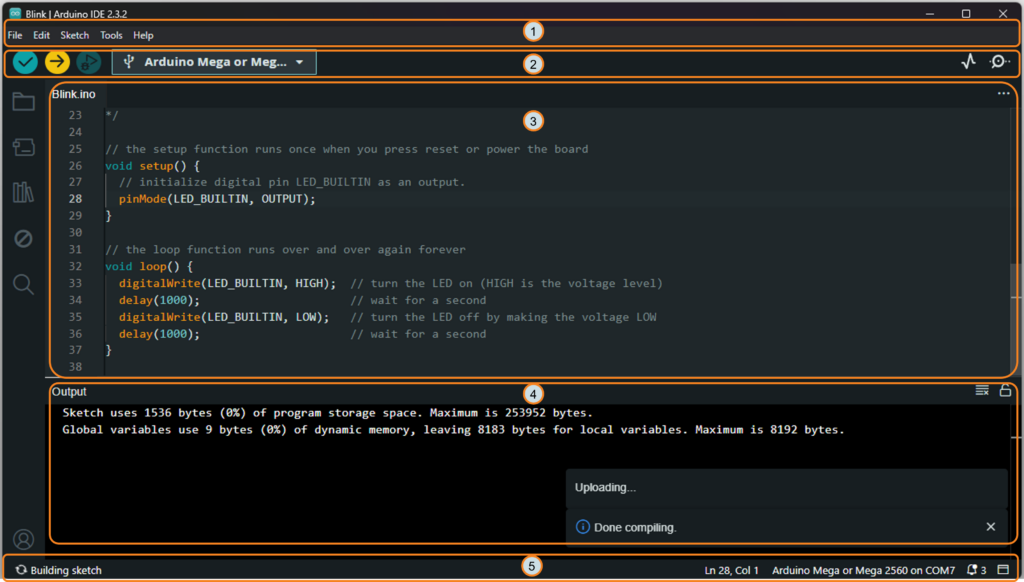
- Menu Bar: This includes menus for file operations, editing functions, tools for setting board parameters, help resources, and more.
- Toolbar: Contains buttons for commonly used functions such as verifying/compiling code, uploading code to the Arduino board, creating a new sketch, opening an existing sketch, saving, and opening the Serial Monitor.
- Code Editor: The central area where you write and edit your sketch. The editor supports syntax highlighting, which facilitates the reading and writing of code.
- Console Window: Located at the bottom of the IDE, this window displays information about the compilation process and messages from the Arduino board when connected to the Serial Monitor.
- Status Bar: Displays information about the current sketch and the connected board.
- Verify/Compile Button: Checks your code for errors and compiles it into a format that can be uploaded to the board.
- Upload Button: Sends the compiled program to the connected hardware, such as an Arduino or ESP32 module.
- Board and Serial Port Selection: This area lets you select the active board type, such as “Arduino Uno”, as well as the serial port it’s connected to, such as COM5, COM13, or COM12. It’s essential to pick the correct board and port for successful code upload to your device.
- Sketchbook: The Sketchbook section provides quick access to all your saved sketches. By selecting a project, such as test.ino, it opens for editing within the IDE. This feature streamlines project management and allows for effortless switching between different sketches.
- Board and Serial Port Selection: This dropdown lets you choose your target board, like “Arduino Uno”, and the port it’s connected to, such as COM5.
- Library Manager: A tool within the IDE that allows you to search for and manage additional code libraries needed for your project.
- Serial Monitor Button: Opens the Serial Monitor, which is crucial for debugging by displaying data exchanged between the Arduino board and your computer.

Programming the Arduino
Let’s start programming the Arduino. The first piece of code we’ll write is to control an LED. This basic exercise will introduce us to writing, compiling and uploading a sketch to the Arduino board.
/**
 * Author: Omar Draidrya
 * Date: 2024/04/11
 * This code blinks an LED connected to a specified pin on and off with a one-second interval.
 */

// Define the LED pin
const int LED_PIN = 13;

// The setup function runs once when you power up or reset the board
void setup() {
    // Set the LED_PIN as an output
    pinMode(LED_PIN, OUTPUT);
}

// The loop function runs over and over again forever
void loop() {
    digitalWrite(LED_PIN, HIGH); // Turn on the LED
    delay(1000);                 // Wait for a second
    digitalWrite(LED_PIN, LOW);  // Turn off the LED
    delay(1000);                 // Wait for a second
}
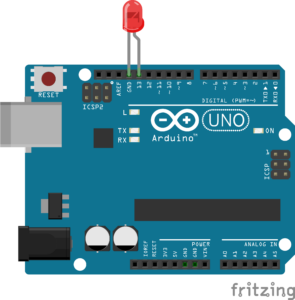
In the setup() function, we configure pin 13 as an output because that’s where our LED is connected. Then, in the loop() function, we turn the LED on and off with a one-second interval between each state change.
Now, connect the Arduino board to your computer using a USB cable. Click the upload button in the Arduino IDE to transfer the code to the board. As shown in the image, once the code is uploaded, the LED on the board starts blinking—alternating between one second on and one second off. This blinking is a visual confirmation that your code is working correctly.
