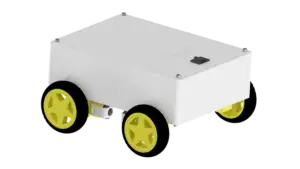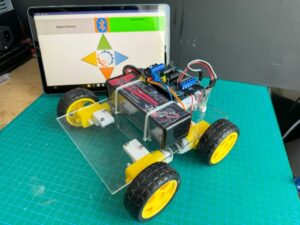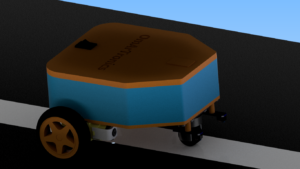
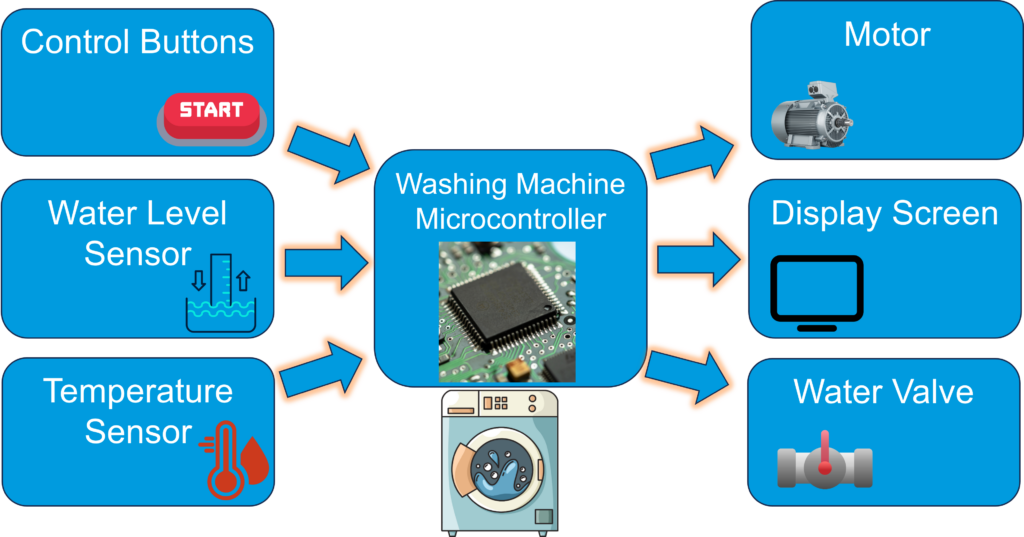
Welcome to OmArTronics! Today, we’re going to take a closer look at microcontrollers and why they’re so important in modern electronic projects, particularly in robotics and smart systems. A microcontroller is sometimes compared to a robot’s brain centre because it contains a whole computing system on a single chip. This feature makes the microcontroller, particularly the Arduino board, really special. Take a washing machine, for instance. The microcontroller looks at data from sensors and user interfaces to work out what the machine is doing. You can choose washing preferences, like cycle type and water temperature, using the control buttons. The water level sensor helps to fill the drum with the right amount of water, while the temperature sensor makes sure the heat is at the right temperature. Once it’s got all this info, the microcontroller sends commands to the machine’s actuators. It controls the motor and makes sure the drum is spinning during the wash and spin cycles. The display panel shows the current condition and any changes, so the user knows what’s going on. The microcontroller also controls the water valve, making sure the water comes in and out at the right times to keep the water level and temperature just right.
What is a microcontroller?
A microcontroller is a complete computer on a single chip, also known as a System-on-a-Chip (SoC). This integrated system includes everything from the processing unit to memory and input/output ports. Unlike a traditional PC, which relies on an extensive and interchangeable hardware architecture, a microcontroller provides a compact and robust solution for programming and controlling electronic systems.
Why are microcontrollers important to intelligent systems and robots?
Like humans, intelligent systems need a “brain” or central processing unit that receives information from the environment through sensors, processes it, and then makes decisions. These decisions are then sent as commands to different parts of the intelligent system to perform specific actions. The software that controls this complex network of actions runs on a microcontroller.
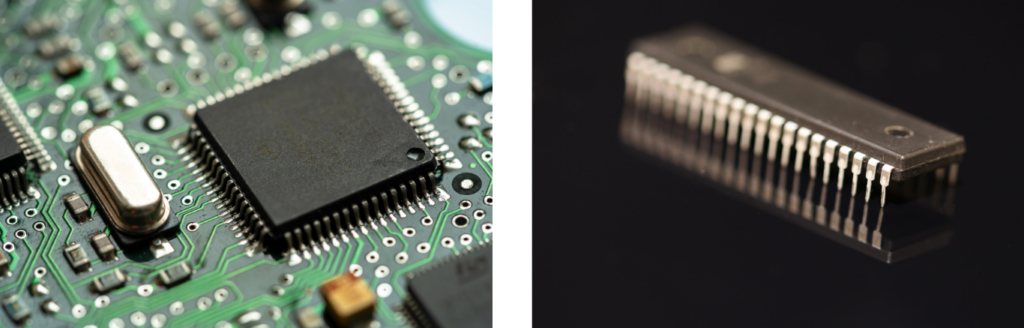
The ATmega328p Microcontroller
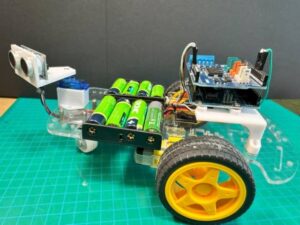
A popular example of a microcontroller widely used in intelligent systems is the ATmega328p from Atmel. This chip is known for its versatility and performance, with numerous inputs and outputs for sensors, actuators, and communication modules. It is the brain behind many Arduino projects, allowing both enthusiasts and professionals to design and program complex electronic systems.
The Arduino Board
Arduino is an open microcontroller platform popular with hobbyists and educational institutions. An Arduino board integrates a microcontroller (such as the ATmega328p) and provides an easy-to-use environment for programming and prototyping. Arduino boards are known for their ease of use and the large online community that provides support and inspiration.
Alternatives to the Arduino Board
In addition to Arduino, there are other exciting platforms that can be attractive depending on the project and application:
– LEGO Mindstorms: Offers an intuitive, graphical programming environment and is ideal for young learners and those who want to approach robotics in a playful way. LEGO Mindstorms kits allow you to build a variety of robots using LEGO parts, motors, and sensors.
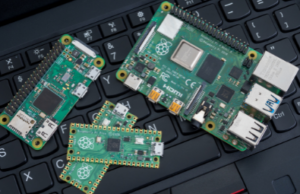
– Raspberry Pi: A small, low-cost computer for projects that require both hardware control and computational applications. Raspberry Pi is ideal for media servers, home automation systems, and many other projects that require more processing power.

What makes Arduino and its microcontrollers unique is that they run code directly without an operating system. This means that projects start immediately upon power-up, providing high efficiency and reliability for control and automation tasks.
The Arduino Platform
The Arduino platform is an open and flexible electronics platform that enables enthusiasts, artists, and developers to create interactive objects or environments. It is based on simple hardware and software that is available to everyone and open source. The platform has its roots in education, where it is used to teach the basics of electronics and programming.
The Arduino Hardware
At the heart of the Arduino hardware is the Arduino board, a microcontroller-based development board for prototyping and testing electronic circuits. It provides a range of inputs and outputs for connecting sensors, actuators, and other components.
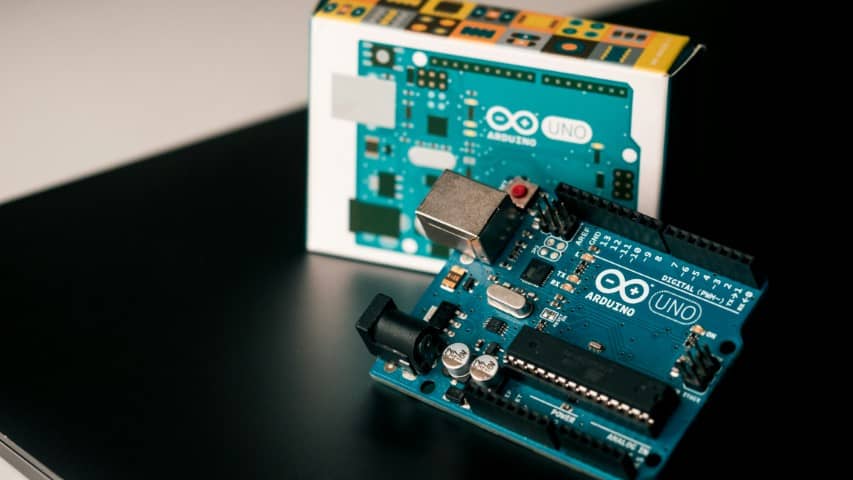
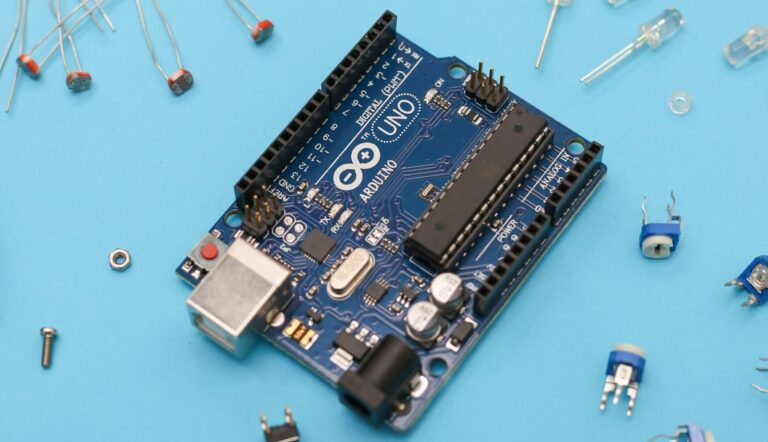
The Arduino Uno
The cornerstone of many Arduino projects is the Arduino Uno, a microcontroller board known for its ease of use and versatility. “Uno” means “one” in Italian, a reference to the fact that it was one of the first boards in the Arduino family. The Arduino Uno serves as a starting point for many newcomers to programming and electronics. It is equipped with an ATmega328P microcontroller, digital input and output pins, analog inputs, a USB port for programming, and an external power supply.
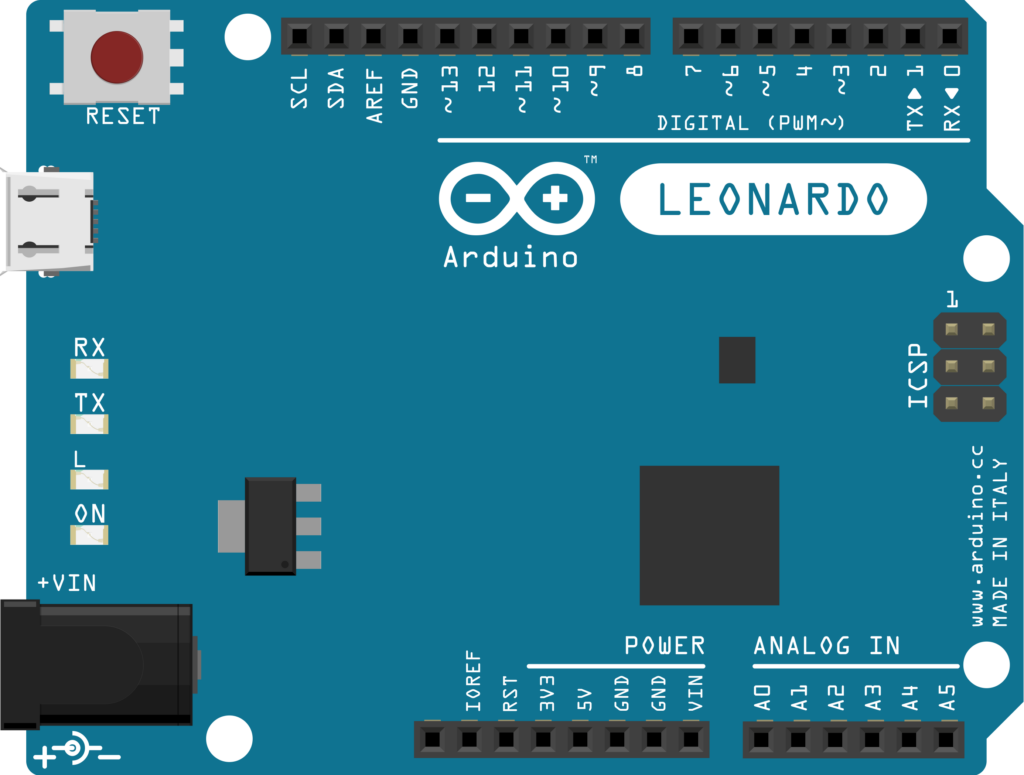
Here is the Arduino Uno’s main features:
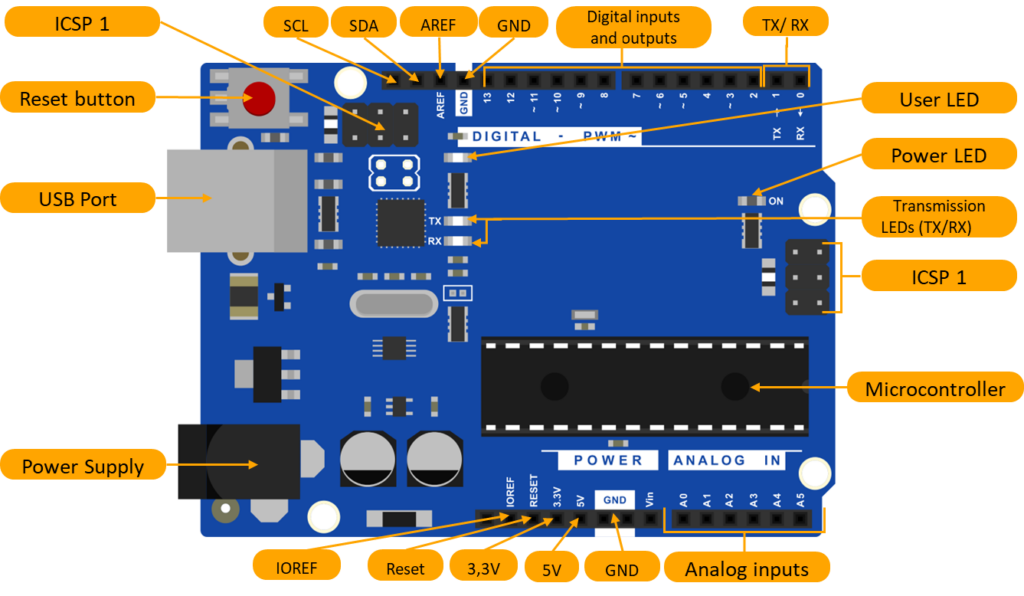
Reset button: This button reboots your Arduino Uno and causes a reset of the program. It’s a quick way to start over without having to disconnect and reconnect power to the board.
ICSP connector 2: This interface is used for in-circuit serial programming, allowing you to update the Arduino’s firmware or bypass the bootloader.
Inputs/Outputs: The board includes digital pins for reading signals from sensors or controlling various devices, as well as analog inputs for reading various voltages.
User LED: This LED, labeled ‘L’, can be programmed to light or blink and can be used as a diagnostic tool or for user interaction in your projects.
Power LED: This light indicates that the Arduino Uno is connected to a power source and is ready for operation.
ICSP connector 1: Similar to ICSP connector 2, this is used for serial programming of the board, specifically for flashing software directly to the microcontroller.
Microcontroller: The ATmega328P microcontroller is the brain of the Arduino Uno, processing input from peripherals and executing your uploaded code.
Mounting points: Four mounting points provide the ability to securely attach the Arduino Uno to any base or project, which is critical for projects that involve motion or external forces.
Transmission LEDs (TX/RX): These LEDs indicate data transmission, with the TX (transmitter) LED blinking when the Arduino is sending data and the RX (receiver) LED blinking when data is received.
Power Supply Jack: This jack allows the Arduino Uno to be powered from an external power source, which can be critical for projects that require more power than the USB port can provide.
USB Port: The USB port serves multiple purposes – it provides power, allows you to transfer code from your computer to the Arduino, and can also be used for serial communication between the Arduino and your computer.
The Arduino Uno’s versatility is largely due to its many inputs and outputs, which allow it to interact with a wide variety of sensors, actuators, and other devices. The following is a detailed breakdown of its I/O capabilities:
SCL and SDA: These pins are dedicated to the I²C communication protocol, which is used to connect to other I²C devices such as sensors, EEPROMs, or other microcontrollers.
AREF: The Analog Reference pin is used to set an external reference voltage as the upper limit for the analog inputs.
Ground (GND): These are the ground pins of the board, used to complete the circuit by providing a path for the current to return to the source.
Digital inputs and outputs: Digital pins on the Arduino can be used as inputs or outputs. They operate at 5V and can be used for a variety of functions, such as reading a keystroke or controlling an LED.
TX/RX (1 and 0): Pin 1 (TX) is used for serial transmission and pin 0 (RX) is used for serial reception. These pins are used for communication via the serial port of the Arduino.
Analog inputs: These pins, labeled A0 through A5, can read the signal from an analog sensor and convert it to a digital value that can be used in your programs.
Vin: This pin can be used to power the Arduino board from an external power source, ranging from 7 to 12 volts.
5V: This pin outputs a regulated 5V from the board’s power supply, which can be used to power other components in your circuit.
3.3V: This pin provides a 3.3V supply generated by the Arduino’s onboard voltage regulator, useful for powering 3.3V logic level devices.
Reset: The reset pin can be used to restart the microcontroller. It works the same as pressing the reset button on the board.
IOREF: This pin provides the voltage at which the board’s I/O pins operate. This is necessary for shields to adapt to the voltage provided by the board.
Comparison of Arduino Boards
When choosing an Arduino board, there are several factors to consider including the number of inputs and outputs, memory size, processor speed, and physical size. The Arduino Uno might be the most recognized, but other boards in the Arduino family may be more suitable depending on the complexity and requirements of your project. Here’s an expanded comparison:
Arduino Uno: Known for its user-friendly interface, the Uno is the go-to for many beginners. It boasts an ATmega328P microcontroller, 14 digital I/O pins (of which 6 provide PWM output), and 6 analog input pins. With 32 KB of flash memory and 2 KB of SRAM, it’s suitable for most basic projects. The Uno operates at 16 MHz and uses a Type B USB for programming and power, making it slightly larger but still easy for breadboarding.
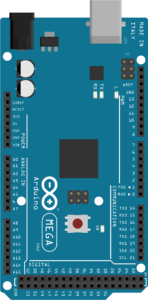
Arduino Mega: This board is like the big brother to the Uno. It features an ATmega2560 microcontroller with 54 digital I/O pins, 16 analog inputs, and an impressive 256 KB of flash memory. The Mega’s 16 MHz clock speed and expanded 8 KB SRAM make it ideal for more demanding projects like 3D printers and robotics. Its larger form factor accommodates the additional pins and offers more connectivity options, but its power consumption is also higher.
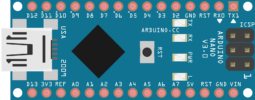
Arduino Nano: The Nano is essentially a compact version of the Uno, featuring the same ATmega328 microcontroller. It’s well-suited for projects with space constraints, offering a similar performance to the Uno but with a mini-USB port. The Nano’s 14 digital I/O pins, 8 analog inputs, and 32 KB of flash memory fit onto a significantly smaller board, perfect for integrating into permanent projects or wearables.
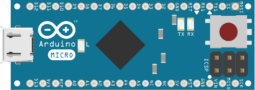
Arduino Micro: As a compact board, the Micro offers 20 digital I/O pins and 12 analog inputs. The ATmega32U4 microcontroller not only runs at 16 MHz but also supports USB communication, eliminating the need for an additional processor. This makes the Micro capable of emulating a mouse or keyboard in addition to standard Arduino functionalities.
Arduino Leonardo: Almost identical to the Micro in terms of specifications, the Leonardo differentiates itself with its micro-USB port and its ability to run complex algorithms thanks to its 32 KB of flash memory and 2.5 KB of SRAM. Its 20 digital I/O pins and 12 analog inputs offer ample connections for sensors and actuators, and it’s capable of directly handling USB communications, which can be a significant advantage for certain applications.
Additional factors to keep in mind include:
Power: The 5V and 3.3V pins supply voltage to shields and other components. The Vin pin allows the board to be powered with an external power source, which is useful for standalone operation.
Programming Environment: All of these boards are supported by the Arduino IDE, which is a versatile programming environment suitable for coding novices and experts alike.
Expandability: Each board has the potential to be expanded with shields—additional boards that offer functionalities like Wi-Fi, motor control, or GPS. This can be a decisive factor if your project requires specific capabilities.
Community and Support: The Arduino community is active and robust, offering a vast repository of guides, tutorials, and forums where you can find support for any Arduino board you choose.
When deciding which Arduino board to use, weigh the requirements of your project against the capabilities of each board. Consider what you need in terms of I/O, memory, processor speed, connectivity, and size. This will help you make an informed decision on which board will best bring your project to life.